Introduction
Forget rubbery yolks and sad, grey whites! This isn’t your grandma’s boiled egg recipe. We’re about to embark on a culinary expedition, transforming the humble egg into a protein-packed powerhouse of flavor and texture, ready to conquer your breakfast plate, lunchbox, or even the most adventurous brunch spread. Get ready to unleash your inner egg-splorer!
Why This Works
This recipe isn’t just about boiling eggs; it’s about mastering the art of the boil. We’re diving deep into the science, ensuring perfectly cooked yolks every single time, whether you prefer them runny, jammy, or firm. It’s speed, precision, and a touch of culinary magic—all to unlock the egg’s maximum potential.
Key Ingredients
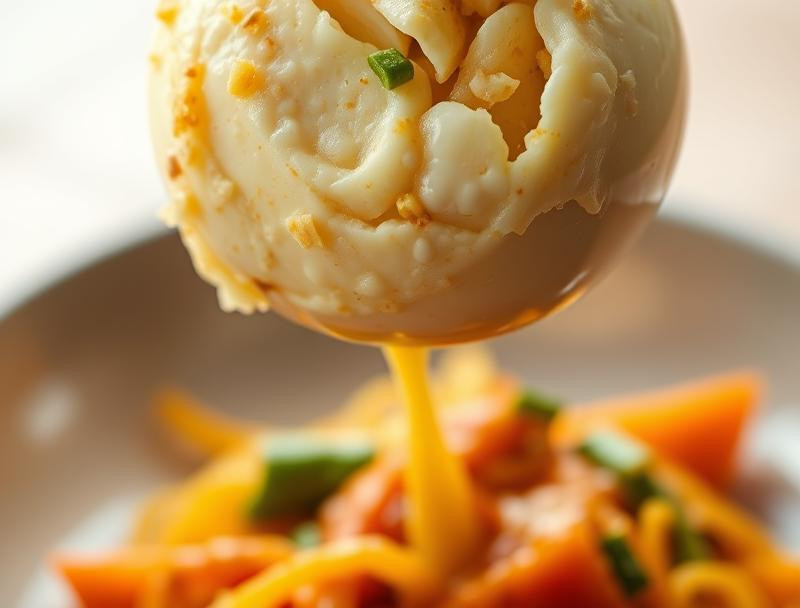
🥚 6 Large Eggs
💧 Water to cover
Instructions
1️⃣ The Gentle Prep: Place the eggs gently into a saucepan. Don’t be rough! We want to preserve those precious pearly whites.
2️⃣ The Perfect Plunge: Add enough cold water to cover the eggs by about an inch. Think spa day for your eggs; a nice, cool soak before the heat.
3️⃣ The Grand Boil: Bring the water to a rolling boil over high heat. This isn’t a simmer; we need a full-on boil to kick things off.
4️⃣ The Timing Tango: Once boiling, immediately remove the pan from the heat. Cover the pan tightly with a lid. Let the eggs sit in the hot water for the desired cooking time (see Handy Tips below).
5️⃣ The Ice Bath Revelation: After the timing is up, immediately transfer the eggs to a bowl filled with ice water to stop the cooking process. This is crucial for preventing that dreaded green ring around the yolk.
6️⃣ The Great Reveal: Once cool enough to handle, gently tap the eggs all over to create cracks in the shell. Peel under cold running water for the easiest peel. Voilà! Perfectly boiled eggs ready to conquer your culinary universe.
Handy Tips
- For a runny yolk, cook for 3-4 minutes.
- For a jammy yolk (slightly set but still runny), cook for 5-6 minutes.
- For a firm yolk, cook for 7-8 minutes.
- Adding a teaspoon of salt to the water can help prevent cracking and make peeling easier. Think of it as a little armor for your eggs.
Heat Control
The key to perfectly boiled eggs is controlled heat. The initial boil is crucial to get things started quickly, but the crucial element is removing the eggs from direct heat and letting the residual heat do the rest. This prevents overcooking and ensures consistent results.
Crunch Factor
While we’re not adding any crunch elements directly to the boiled eggs themselves, the perfectly cooked yolk offers a wonderful contrast in texture––a creamy, rich center against the firm, smooth white. It’s all about that textural dance on your palate.
Pro Kitchen Tricks
- Add a splash of white wine vinegar to the boiling water to help prevent cracking and achieve a smoother peel. It’s a touch of culinary alchemy!
- For easier peeling, use older eggs—their membranes separate from the shell more easily.
- Don’t overcook! It’s better to slightly undercook than to create a tough, rubbery egg.
Storage Tips
Store peeled boiled eggs in an airtight container in the refrigerator for up to 3 days. Keep them submerged in water to maintain freshness and prevent drying out.
Gift Packaging Ideas
Present your perfectly boiled eggs in a charming little basket lined with colorful tissue paper, alongside a small dipping sauce (like aioli or a spicy sriracha mayo). Perfect for a small, thoughtful gift!
Flavor Variations
🌟 Spicy Sriracha Surprise: Add a dash of sriracha to the boiling water for a subtle kick.
🌟 Mediterranean Magic: Marinate the peeled eggs in a mixture of olive oil, lemon juice, oregano, and garlic for a vibrant Mediterranean flavor.
🌟 Smoked Paprika Perfection: Add smoked paprika to the boiling water for a smoky, earthy flavor.
🌟 Curry Coconut Craze: Marinate the eggs in a coconut milk and curry powder mixture for an exotic twist.
Troubleshooting
- Green ring around the yolk: This is caused by overcooking. Reduce cooking time next time and be sure to immediately transfer the eggs to an ice bath.
- Cracked eggs: Use older eggs, add salt to the water, and don’t overcrowd the pan. Gentle handling is key.
- Difficult peeling: Use older eggs and be sure to transfer them to an ice bath immediately after cooking.
FAQ
- Can I use brown eggs? Absolutely! Brown and white eggs cook identically.
- What if I don’t have an ice bath? Running cold water over the eggs for several minutes will help stop the cooking process, but an ice bath is much more effective.
- Can I boil eggs in the microwave? While possible, it’s generally less reliable for achieving perfectly cooked eggs. The stovetop method offers far better control.
- How long can I keep boiled eggs in the fridge? Peeled boiled eggs should be stored in the fridge for up to 3 days.
Conclusion
So there you have it, adventurers! You’ve conquered the art of the perfect boiled egg. Now go forth and create culinary masterpieces, from simple snacks to sophisticated appetizers. Share your egg-cellent creations with the world and let’s all celebrate the humble egg’s potential! Happy cooking!
Egg-splosive Global Flavors: Mastering the Perfect Boil
A delightful fusion of spices and techniques from around the world to create the ultimate boiled egg experience.
Ingredients
- 8 large eggs
- 1 tablespoon salt
- 1 teaspoon black pepper
- 1 teaspoon paprika
- 1 tablespoon soy sauce
- 1 tablespoon vinegar
- 1 teaspoon garlic powder
- 1 teaspoon chili flakes
- Fresh herbs for garnish (optional)
Instructions
- Fill a large pot with water and add salt, vinegar, and soy sauce. Bring to a boil over medium-high heat.
- Once boiling, gently add the eggs using a spoon to avoid cracking. Reduce heat to medium and let boil for 9-12 minutes depending on desired doneness.
- While the eggs are boiling, prepare an ice bath in a bowl with cold water and ice cubes.
- After the boiling time, transfer the eggs immediately to the ice bath to stop the cooking process. Let them sit for 5-10 minutes.
- Peel the eggs under running water for easier shell removal. Sprinkle with black pepper, paprika, garlic powder, and chili flakes before serving.
- Garnish with fresh herbs if desired and serve with a side of your favorite dipping sauce.
Tips
- For a creamier yolk, aim for a shorter boiling time.
- Experiment with different spices and herbs to create your own unique flavor profile.