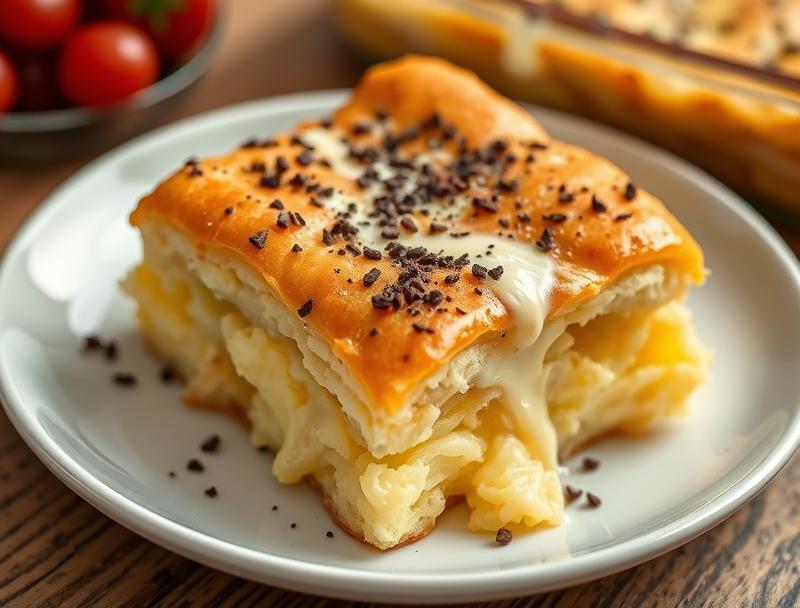
Cheesecake Crescent Rolls Casserole
Introduction
Welcome to the world of creamy, dreamy desserts with the Cheesecake Crescent Rolls Casserole, a game-changing treat that combines the flakiness of crescent rolls with the richness of cheesecake. This innovative dessert is not only a delight to the taste buds but also incredibly easy to make, requiring minimal effort for a show-stopping result. By using everyday ingredients in a creative way, you’ll achieve a masterpiece that’s perfect for family gatherings, parties, or simply a sweet indulgence. The best part? It’s accessible to anyone, regardless of their baking skills, making it a perfect choice for both beginners and seasoned bakers alike.
Why This Works
- Flavor balance and ingredient accessibility: The combination of cheesecake and crescent rolls may sound unusual, but it’s a match made in heaven. The cheesecake filling provides a rich, creamy element, while the crescent rolls add a delightful flakiness and buttery flavor. Plus, all the ingredients are easily found in most supermarkets.
- Ease of preparation: One of the standout features of this dessert is how simple it is to prepare. With just a few steps, you can have a stunning casserole ready to bake. The use of pre-made crescent roll dough simplifies the process even further, reducing prep time significantly.
- Impressive results with minimal effort: Despite its simplicity, the Cheesecake Crescent Rolls Casserole presents beautifully and tastes divine. It’s an ideal choice for those looking to impress without spending hours in the kitchen. The golden-brown crescent rolls on top, paired with the creamy cheesecake, make for a visually appealing dessert that’s sure to be a hit.
Ingredients
- 1 can of crescent roll dough (8-10 rolls)
- 16 ounces of cream cheese, softened
- 1/2 cup of granulated sugar
- 1/2 cup of sour cream
- 1 large egg
- 1 teaspoon of vanilla extract
- 1/4 teaspoon of salt
- 1/4 cup of melted butter
- Optional: Fresh fruit for topping (strawberries, blueberries, etc.)
Instructions
- Step 1: Preheat your oven to 350°F (180°C). Unroll the crescent roll dough and separate the triangles. In a large bowl, mix the cream cheese, granulated sugar, sour cream, egg, vanilla extract, and salt until smooth and well combined.
- Step 2: Arrange half of the crescent roll triangles in the bottom of a 9×13 inch baking dish, overlapping them slightly to cover the entire surface. You may need to trim some of the rolls to fit the dish evenly.
- Step 3: Pour the cheesecake mixture over the crescent rolls in the baking dish. Then, arrange the remaining crescent roll triangles on top of the cheesecake mixture, again overlapping them slightly. Brush the tops of the crescent rolls with the melted butter.
- Step 4: Bake the casserole for about 35-40 minutes, or until the crescent rolls are golden brown and the cheesecake is set. If necessary, cover the top with foil to prevent overbrowning. Remove from the oven and let cool slightly before serving. If desired, top with fresh fruit before serving.
Handy Tips
- Ensure your cream cheese is softened to avoid lumps in the cheesecake mixture. Leaving it at room temperature for a few hours before mixing can help.
- Don’t overmix the cheesecake batter, as this can lead to a dense cheesecake. Mix just until the ingredients are combined.
- If using fresh fruit as a topping, consider arranging it just before serving to prevent the fruit from releasing its juices and making the casserole soggy.
Heat Control
Maintaining the right oven temperature is crucial for this dessert. The ideal temperature is 350°F (180°C), and the casserole should be baked for 35-40 minutes. Keep an eye on it after 30 minutes, as oven times can vary. The crescent rolls should be golden brown, and the cheesecake should be set but still slightly jiggly in the center. Avoid overbaking, as this can cause the cheesecake to dry out.
Crunch Factor
The crunch factor in this dessert comes from the crescent rolls on top. To achieve the perfect crunch, make sure the rolls are golden brown. If you prefer a crisper top, you can broil the casserole for an additional 1-2 minutes after baking. However, keep a close eye on it to prevent burning. The bottom layer of crescent rolls will be softer due to the cheesecake filling, providing a nice texture contrast.
Pro Kitchen Tricks
- For an extra golden glaze on your crescent rolls, brush them with a little bit of egg wash (beaten egg mixed with a tablespoon of water) before baking.
- Consider using a water bath for baking the casserole. This involves placing the baking dish in a larger pan filled with water to about halfway up the sides of the baking dish. A water bath can help the cheesecake cook more evenly and prevent cracking.
Storage Tips
- The Cheesecake Crescent Rolls Casserole can be stored in the refrigerator for up to 3 days. It’s best to cover it with plastic wrap or aluminum foil to prevent drying out.
- For longer storage, consider freezing the casserole after it has cooled completely. Wrap it tightly in plastic wrap or aluminum foil and place it in a freezer-safe bag. It can be frozen for up to 2 months. When you’re ready to serve, thaw it overnight in the refrigerator and bake at 350°F (180°C) for about 20-25 minutes, or until warmed through.
- When reheating, avoid microwaving the entire casserole, as this can cause uneven heating and a soggy texture. Instead, reheat individual servings in the microwave for about 20-30 seconds, or until warmed through.
Gift Packaging Ideas
If you’re considering gifting this delightful dessert, presentation is key. One idea is to bake the casserole in a disposable aluminum pan, which can then be wrapped in decorative foil and tied with a ribbon. Another option is to cut the casserole into squares or bars, place them in airtight containers, and decorate the containers with gift tags or stickers. For a more rustic look, consider using wooden crates or baskets lined with parchment paper and filled with the cheesecake bars.
Flavor Variations
- Different spices: Add a pinch of cinnamon, nutmeg, or cardamom to the cheesecake mixture for a unique twist. These spices pair well with the sweetness of the cheesecake and the butteriness of the crescent rolls.
- Creative toppings: In addition to fresh fruit, consider other toppings like caramel sauce, chopped nuts, or even candy pieces to add texture and flavor contrast.
- Ingredient swaps: For a gluten-free version, look for gluten-free crescent roll dough. You can also experiment with different types of cheese or add-ins like chocolate chips to the cheesecake mixture.
Troubleshooting
- Texture problems: If your cheesecake turns out too dense, it might be due to overmixing the batter. For a lighter texture, mix the ingredients just until they’re combined, and avoid overbaking.
- Ingredient replacements: If you’re missing an ingredient, there are often substitutes you can use. For example, sour cream can be replaced with Greek yogurt, and granulated sugar can be substituted with brown sugar for a slightly different flavor.
- Over/undercooking signs: Keep an eye on your casserole while it’s baking. If the crescent rolls are getting too brown, cover the top with foil. If the cheesecake is not set after the recommended baking time, bake for a few more minutes and check again.
FAQs
- Can I freeze it? Yes, the Cheesecake Crescent Rolls Casserole can be frozen for up to 2 months. It’s best to freeze it after it has cooled completely, then thaw and reheat when needed.
- Is it gluten-free? The traditional recipe uses regular crescent roll dough, which contains gluten. However, you can make a gluten-free version by using gluten-free crescent roll dough.
- Can I double the recipe? Yes, you can double the recipe if you’re serving a larger crowd. Just keep in mind that you’ll need a larger baking dish and possibly a bit more baking time.
Conclusion
In conclusion, the Cheesecake Crescent Rolls Casserole is a dessert that will surely impress your family and friends with its unique combination of textures and flavors. It’s a versatile recipe that can be adapted to various tastes and dietary needs, making it perfect for any occasion. Whether you’re a seasoned baker or just starting out, this recipe is sure to become a favorite. So, go ahead, give it a try, and enjoy the ooohs and ahhhs as you present this stunning dessert. Remember, the key to success lies in the simplicity and accessibility of the ingredients, combined with a bit of creativity and patience. Happy baking!