Philadelphia Cheesecake Bars
Introduction
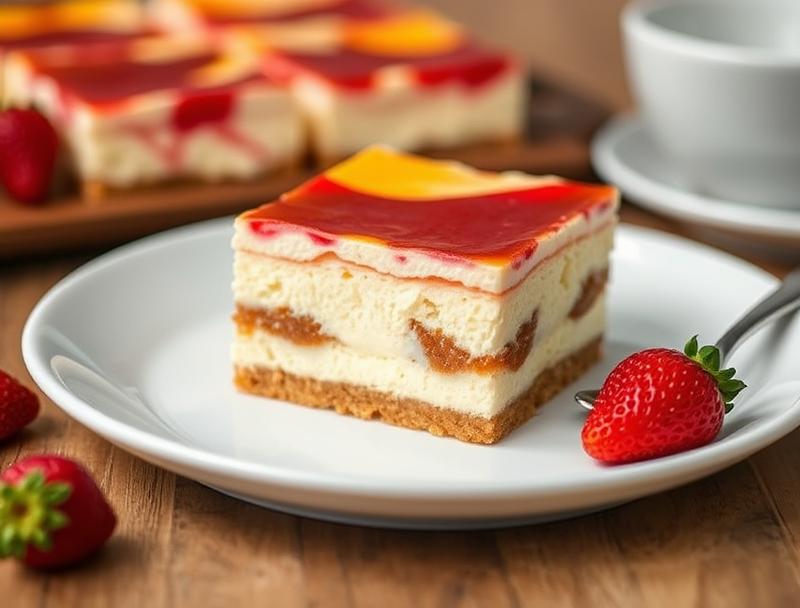
Imagine a dessert that combines the richness of cheesecake with the convenience of a bar dessert, all while showcasing the unmistakable taste of Philadelphia cream cheese. The Philadelphia Cheesecake Bars are a masterpiece of simplicity and flavor, perfect for anyone looking to impress their family and friends without spending hours in the kitchen. These bars are incredibly easy to make, requiring everyday ingredients that you might already have in your pantry, and they offer a canvas for creativity with various toppings and flavor combinations. Whether you’re a seasoned baker or a beginner in the kitchen, this recipe is sure to become a favorite.
Why This Works
- Flavor balance and ingredient accessibility: The combination of a buttery graham cracker crust, a creamy cheesecake filling, and the option for various toppings creates a perfectly balanced flavor profile that is both decadent and refreshing. The ingredients are easily accessible in most supermarkets, making this dessert achievable for anyone.
- Ease of preparation: The steps involved in making these cheesecake bars are straightforward and simple. From preparing the crust to mixing the cheesecake batter and baking, each step is designed to be easy to follow and execute, even for those who are new to baking.
- Impressive results with minimal effort: Despite the simplicity of the recipe, the end result is a dessert that looks and tastes impressive. The bars are perfect for potlucks, dinner parties, or as a special treat for the family, all without requiring an excessive amount of time or effort.
Ingredients
- 1 1/2 cups graham cracker crumbs
- 1/4 cup granulated sugar
- 6 tablespoons (3/4 stick) unsalted butter, melted
- 12 ounces (1 1/2 packages) cream cheese, softened
- 1/2 cup granulated sugar
- 2 large eggs
- 1 teaspoon vanilla extract
- 1 cup sour cream
- Optional toppings: fresh fruits, nuts, chocolate chips, caramel sauce
Instructions
- Step 1: Prepare the Crust – Preheat your oven to 350°F (180°C). In a medium bowl, mix together the graham cracker crumbs and sugar. Pour in the melted butter, and stir until the crumbs are evenly moistened. Press the mixture into the bottom of a 9×9-inch baking dish. Bake for 10 minutes, then set aside to cool.
- Step 2: Prepare the Cheesecake Batter – In a large mixing bowl, beat the cream cheese until smooth. Add the granulated sugar and beat until combined. Beat in the eggs one at a time, followed by the vanilla extract. Stir in the sour cream until well combined.
- Step 3: Assemble and Bake – Pour the cheesecake batter over the prepared crust. Smooth the top with a spatula. Bake for 25-30 minutes or until the edges are set and the center is slightly jiggly. Avoid overbaking.
- Step 4: Cool and Chill – Let the bars cool completely in the pan on a wire rack. Once cooled, cover the pan with plastic wrap and refrigerate for at least 4 hours or overnight.
Handy Tips
- For a golden brown crust, make sure to not overbake it in the initial step. Keep an eye on it after 8 minutes, as oven times can vary.
- To ensure the cheesecake sets properly, avoid overmixing the batter, and don’t open the oven door during the baking time.
- Consider using a water bath to bake the cheesecake for a smoother top and to prevent cracking, although this step is optional.
Heat Control
The ideal temperature for baking the crust and the cheesecake is 350°F (180°C). For the crust, bake for 10 minutes, and for the cheesecake, bake for 25-30 minutes. It’s crucial to keep an eye on the cheesecake after 20 minutes, as the baking time might slightly vary depending on your oven. The cheesecake is done when the edges are set, and the center is just slightly jiggly. Avoid overbaking, as this can cause the cheesecake to dry out.
Crunch Factor
The crunch in these cheesecake bars comes from the graham cracker crust. To achieve the perfect crunch, ensure that the crust is baked until it’s lightly browned and firm to the touch. Avoid overbaking, as this can make the crust too hard. If you’re adding nuts or other crunchy toppings, sprinkle them on top of the cheesecake before baking for added texture.
Pro Kitchen Tricks
- For a clean cut, chill the bars in the refrigerator overnight and use a sharp knife to cut them. Wipe the knife clean between cuts for smooth, even edges.
- To prevent the cheesecake from cracking, ensure it cools slowly and evenly. Avoid sudden temperature changes, and don’t remove it from the pan until it has cooled completely.
Storage Tips
- These cheesecake bars can be stored in an airtight container in the refrigerator for up to 5 days.
- For longer storage, consider freezing the bars. Wrap them tightly in plastic wrap or aluminum foil and place them in a freezer-safe bag. Frozen bars can be stored for up to 2 months. Thaw frozen bars in the refrigerator overnight before serving.
Gift Packaging Ideas
If you’re planning to gift these delicious cheesecake bars, consider packaging them in decorative tin containers or gift boxes lined with parchment paper. You can also wrap individual bars in plastic wrap or cellophane bags and tie them with a ribbon for a more personalized touch. Adding a handwritten note or a small bag of toppings on the side can make the gift even more special.
Flavor Variations
- Different spices: Add a pinch of cinnamon, nutmeg, or cardamom to the cheesecake batter for a unique twist.
- Creative toppings: Use fresh fruits like strawberries, blueberries, or raspberries, or add a sprinkle of chocolate chips, nuts, or caramel sauce on top of the cheesecake before baking for added flavor and texture.
- Ingredient swaps: Replace the graham cracker crumbs with chocolate sandwich cookies or wafers for a different crust flavor. You can also use different types of cream cheese or add a dollop of sour cream on top for extra flavor.
Troubleshooting
- Texture problems: If the cheesecake is too dense, it might be overmixed. If it’s too soft, it might not be baked long enough.
- Ingredient replacements: If you don’t have sour cream, you can replace it with Greek yogurt or a mixture of milk and lemon juice as a substitute in the cheesecake batter.
- Over/undercooking signs: An overbaked cheesecake will be dry and cracked, while an underbaked one will be too jiggly in the center. Adjust the baking time based on your oven’s performance and the size of your cheesecake.
FAQs
- Can I freeze it? Yes, you can freeze the cheesecake bars for up to 2 months. Wrap them tightly and store in a freezer-safe bag.
- Is it gluten-free? The traditional recipe includes graham cracker crumbs, which contain gluten. However, you can make a gluten-free version by replacing the graham crackers with gluten-free alternatives.
- Can I double the recipe? Yes, you can double the recipe to make a larger batch. Just ensure you have a large enough baking dish, and adjust the baking time accordingly.
Conclusion
Making Philadelphia Cheesecake Bars is a rewarding experience that combines ease of preparation with impressive results. These bars are perfect for any occasion, from casual gatherings to special events, and they offer a versatile canvas for your creativity with various toppings and flavor combinations. Whether you’re a fan of classic cheesecake or looking to try something new, these bars are sure to delight. So, go ahead, get baking, and enjoy the delightful taste of Philadelphia in every bite!