No Bake Mini Banana Cream Pies
Introduction
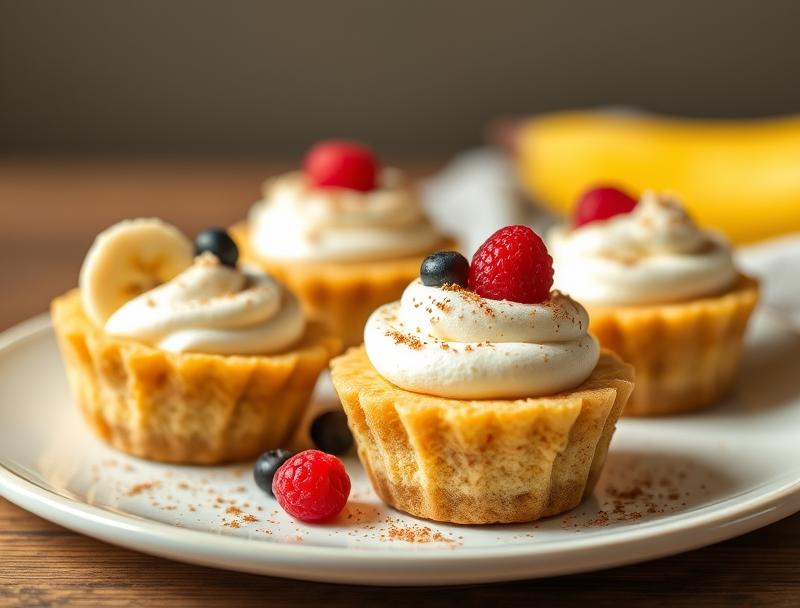
Imagine indulging in the creamy richness of banana cream pie without the hassle of baking. These no-bake mini banana cream pies are a game-changer for anyone looking for a quick, easy, and delicious dessert. By utilizing everyday ingredients and a simple no-bake method, you can create an impressive dessert that’s perfect for any occasion. The combination of fresh bananas, vanilla pudding, and whipped cream, all nestled in a bed of crunchy cookie crust, is a match made in heaven. This recipe is not only a treat for the taste buds but also a testament to the creativity that can be achieved with minimal effort and ingredients you likely have on hand.
Why This Works
- The balance of flavors between the sweetness of the bananas and the cookies, the creaminess of the pudding, and the freshness of the whipped cream creates a delightful harmony that will leave you wanting more.
- The accessibility of the ingredients means you can whip up these mini pies at a moment’s notice, without needing to visit a specialty store.
- The no-bake aspect of this recipe makes it incredibly easy to prepare, requiring no cooking skills whatsoever. Just mix, layer, and chill, making it perfect for hot summer days or for those who are new to baking.
- The impressive presentation of these individual pies, with their golden crusts and towering whipped cream, belies the minimal effort required to prepare them, making them an excellent choice for dinner parties or special events.
Ingredients
- 1 1/2 cups vanilla wafers, crushed
- 1/4 cup granulated sugar
- 1/4 cup melted unsalted butter
- 4 large ripe bananas, sliced
- 1 package (4 servings) vanilla pudding mix
- 1 1/2 cups milk
- 1 cup heavy whipping cream
- 2 tablespoons granulated sugar (for whipping cream)
- 1 teaspoon vanilla extract
- Whipped cream and additional sliced bananas for topping (optional)
Instructions
- Step 1: Prepare the Crust – In a medium bowl, mix together the crushed vanilla wafers and granulated sugar. Stir in the melted butter until the mixture is evenly moistened. Press about 1 tablespoon of the mixture into the bottom of each mini pie dish or muffin tin cup. Refrigerate for at least 10 minutes to set.
- Step 2: Prepare the Filling – In a large bowl, combine the vanilla pudding mix and milk. Whisk until the pudding is smooth and well combined. Arrange a few slices of banana on top of the crust in each mini pie dish. Pour the pudding mixture over the bananas.
- Step 3: Chill the Pies – Cover the pies with plastic wrap, pressing the wrap directly onto the surface of the pudding to prevent a skin from forming. Refrigerate for at least 3 hours or overnight until the pudding is set.
- Step 4: Top with Whipped Cream – Just before serving, whip the heavy whipping cream and granulated sugar until stiff peaks form. Add the vanilla extract and mix well. Top each pie with a dollop of whipped cream and additional sliced bananas if desired.
Handy Tips
- For a crunchier crust, you can bake the crusts in a preheated oven at 350°F (180°C) for 5-7 minutes. Keep an eye on them to prevent burning.
- Use very ripe bananas for the best flavor. If your bananas are not ripe, you can speed up the ripening process by placing them in a paper bag.
- Don’t overdue the pudding mixture, as it can become too thick and sticky. Stop whisking once the mixture is smooth.
Heat Control
Since this is a no-bake recipe, heat control is not an issue. However, if you choose to bake your crusts for a crunchier texture, ensure your oven is preheated to the correct temperature (350°F or 180°C) and keep a close eye on the crusts to avoid overbrowning.
Crunch Factor
The crunch factor in these mini pies comes from the vanilla wafer crust. To achieve the perfect crunch, press the crust mixture firmly into the bottoms of the pie dishes and refrigerate until set. If you prefer a softer crust, you can skip the refrigeration step, but the crust might not hold its shape as well.
Pro Kitchen Tricks
- To ensure that your whipped cream holds its shape, make sure your bowl and whisk are chilled before whipping. You can place them in the freezer for about 10 minutes.
- For an extra creamy pudding, use half-and-half or a mixture of milk and heavy cream instead of regular milk.
- Consider using different types of cookies for the crust, like chocolate sandwich cookies for a chocolate-banana twist, to mix things up.
Storage Tips
- These mini pies are best served fresh, but they can be stored in the refrigerator for up to 24 hours.
- If you’re making the pies ahead of time, it’s best to prepare the crusts and pudding, then assemble and top with whipped cream just before serving.
- Leftover pies can be covered with plastic wrap and stored in the refrigerator. Let them come to room temperature before serving for the best texture.
Gift Packaging Ideas
If you’re considering gifting these mini pies, they can be beautifully packaged in small gift boxes or containers. Top each pie with a dollop of whipped cream and a sprinkle of nutmeg or chocolate shavings for a decorative touch. You can also include a packet of vanilla wafers on the side for an extra-special gift. Wrap the boxes in ribbon or twine and add a gift tag for a personal touch.
Flavor Variations
- Try adding a teaspoon of cinnamon or nutmeg to the pudding mixture for an extra depth of flavor.
- Use different types of milk, such as almond or soy milk, for a non-dairy version of the pies.
- Top the pies with caramel sauce, chopped nuts, or shaved chocolate for different textures and flavors.
Troubleshooting
- If your pudding doesn’t set, it might be due to insufficient chilling time or using low-quality pudding mix. Try chilling it for a few more hours or using a different brand of pudding mix.
- If the crust becomes too hard, it might have been overbaked. Next time, bake for a shorter duration or skip baking altogether for a softer crust.
- If the whipped cream becomes too runny, it might have been over-whipped or the cream wasn’t chilled enough. Try whipping a new batch with chilled equipment and stopping once stiff peaks form.
FAQs
- Can I freeze these pies? – While it’s possible to freeze the components of the pie (like the crust and pudding) separately, it’s not recommended to freeze the assembled pies. The texture of the whipped cream and the pudding might change upon thawing.
- Is this recipe gluten-free? – Depending on the brand of vanilla wafers and pudding mix you use, this recipe might not be gluten-free. Look for gluten-free alternatives to make this recipe accessible to those with gluten intolerance.
- Can I double the recipe? – Yes, you can easily double or triple this recipe to make more mini pies. Just ensure you have enough mini pie dishes or muffin tin cups.
Conclusion
These no-bake mini banana cream pies are a testament to the simplicity and elegance that can be achieved in dessert making. With their easy preparation, accessible ingredients, and impressive presentation, they’re perfect for both novice bakers and seasoned chefs. Feel free to experiment with different flavors and toppings to make this recipe your own, and don’t hesitate to share your creations with friends and family. Whether you’re looking for a quick dessert for a weeknight dinner or a show-stopping treat for a special occasion, these mini pies are sure to delight. So go ahead, get creative, and indulge in the creamy, dreamy world of banana cream pies!